I changed my mind on what I wanted to work on yesterday. Instead of working on the island, I decided I wanted to try to knock off as many of the small items left on my to-do list as possible. I won’t bore you with every tiny detail, but I started off the day with 30 items on my list, and I got 14 of them done, and the 15th is in progress. So it was a very productive day! And getting almost 15 things knocked off of my list felt so much more satisfying than just trying (and possibly failing) to get one big thing done. I needed that boost yesterday.
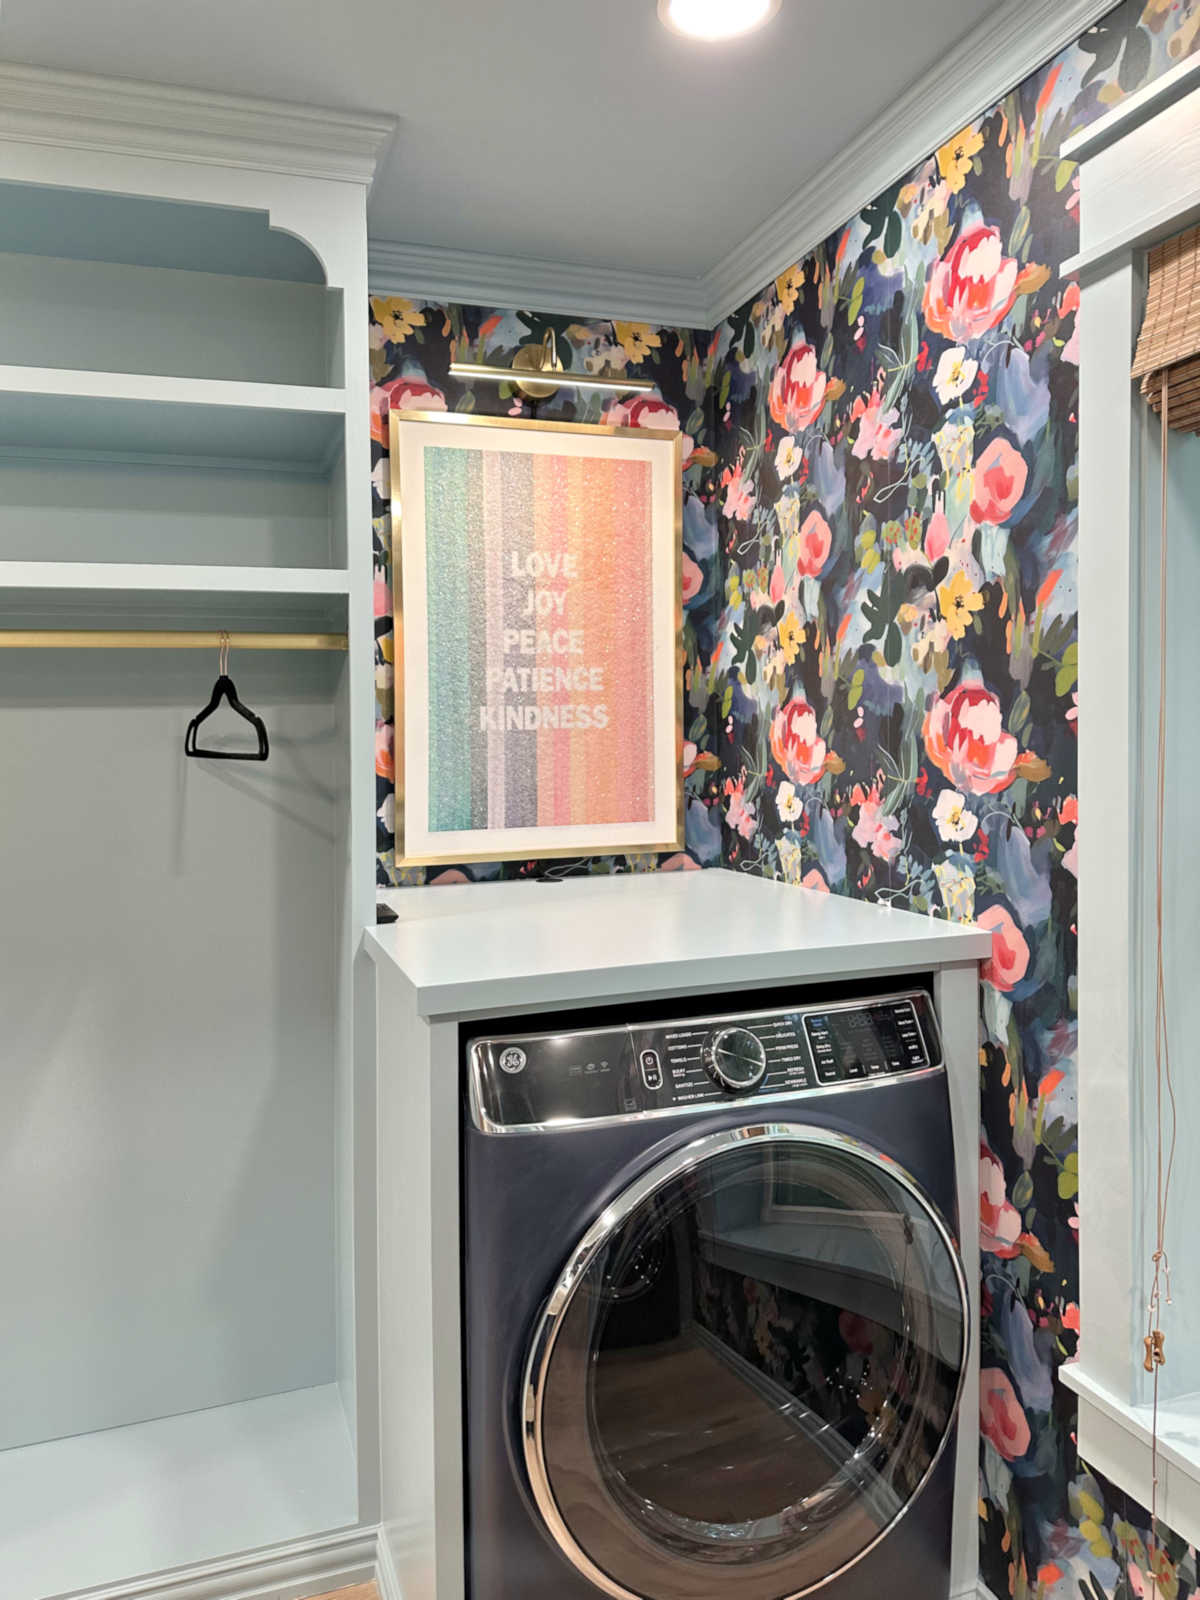
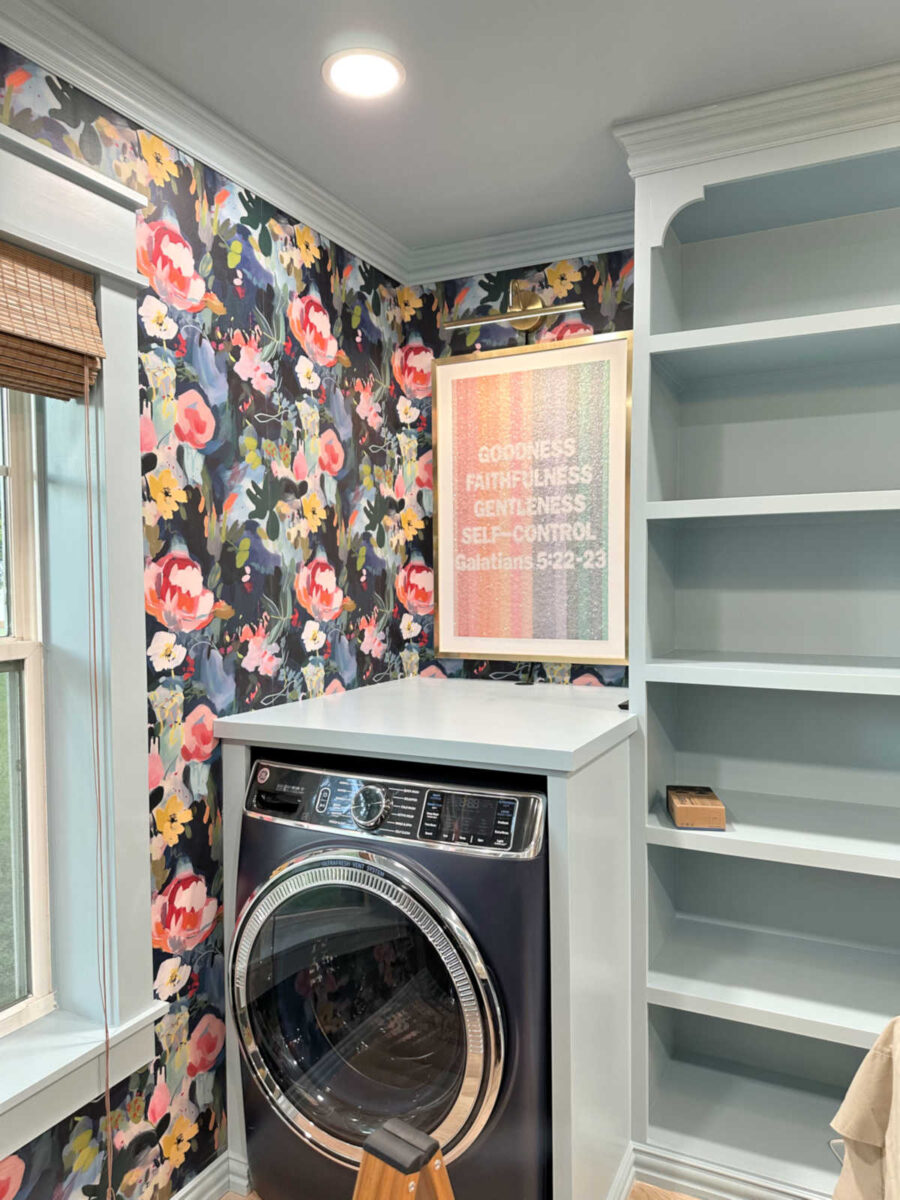
The first thing I wanted to get done was hanging the pictures and lights above the washer and dryer. I purchased these picture lights (affiliate link) that come ready to be hardwired, but I didn’t want to put junction boxes in the wall. So I decided to wire them so that they can be plugged in instead. Thankfully, they had a hole in the backplate so that they could be wired for plugin.
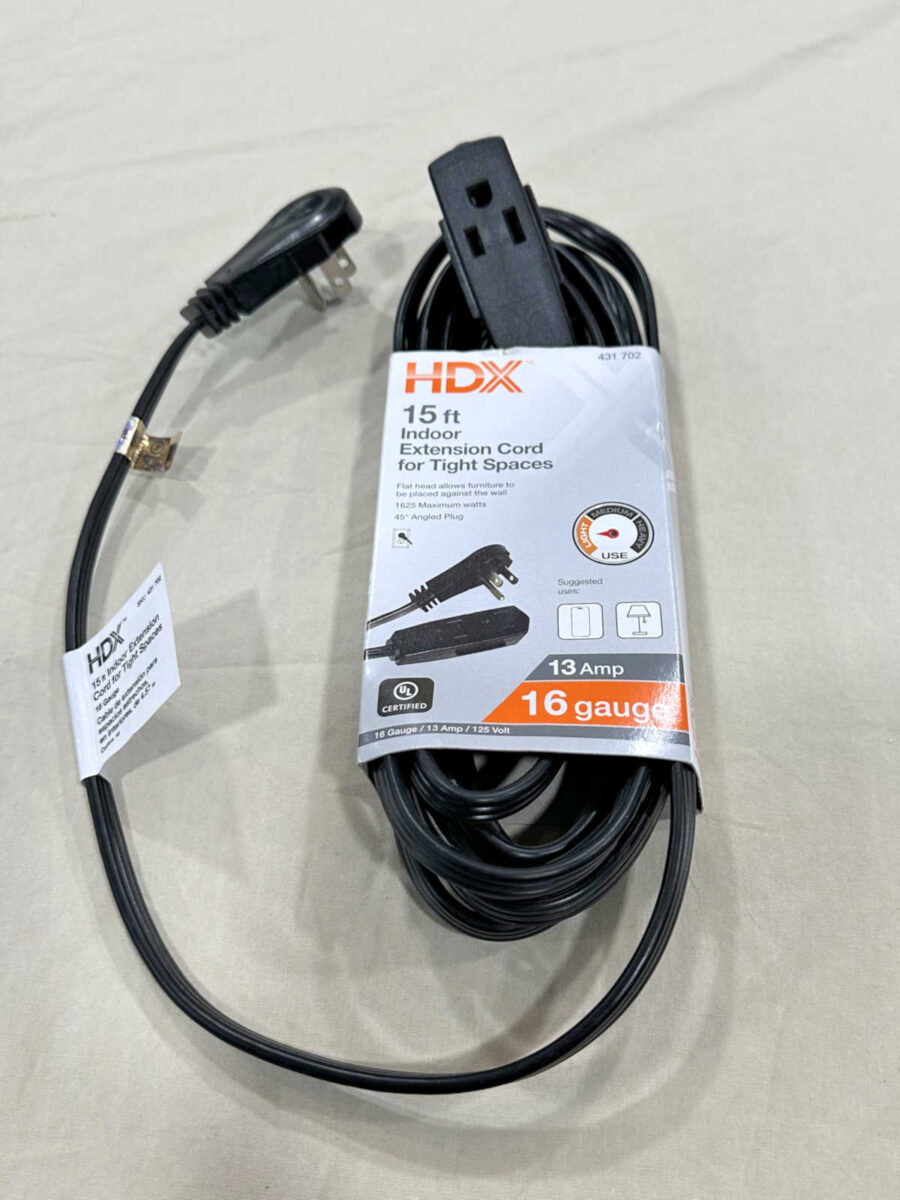
To do that, I purchased two of these extension cords from Home Depot…
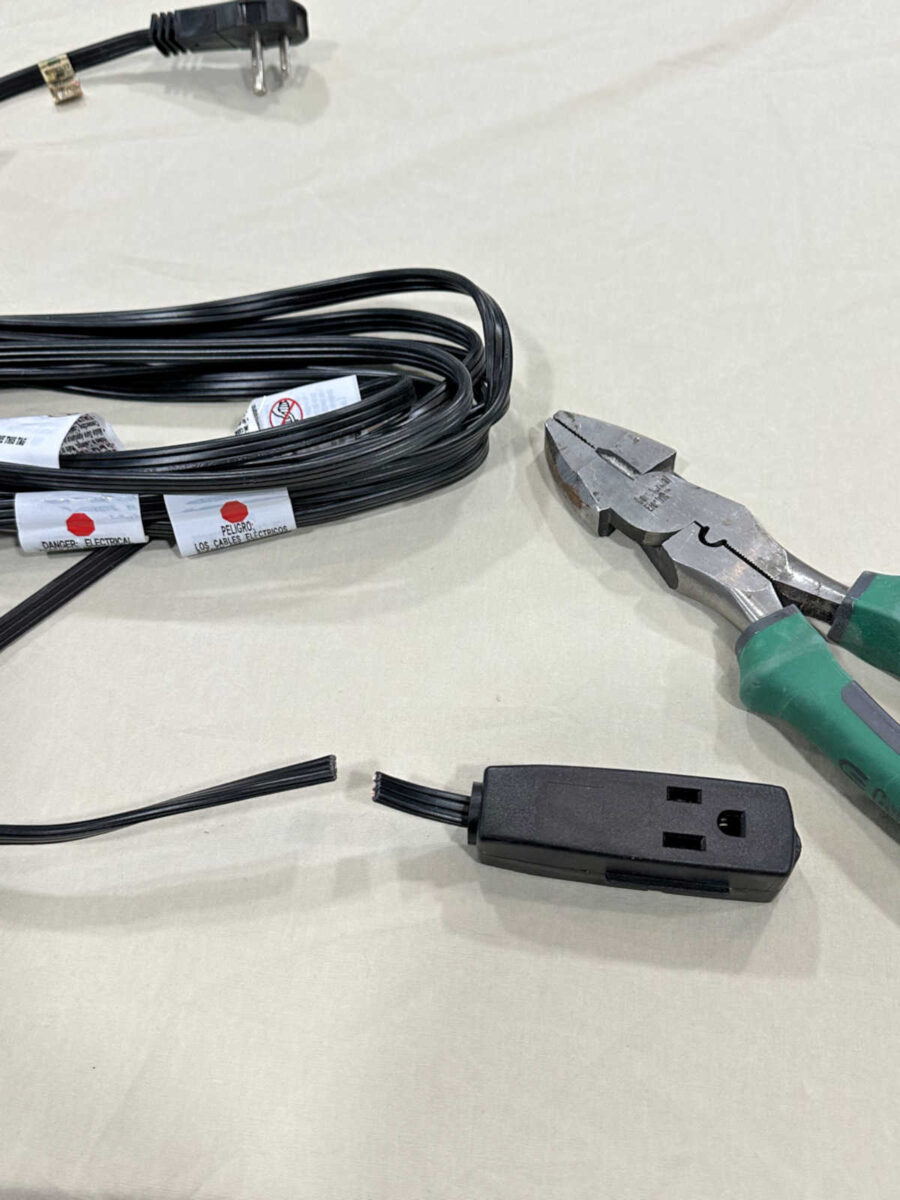
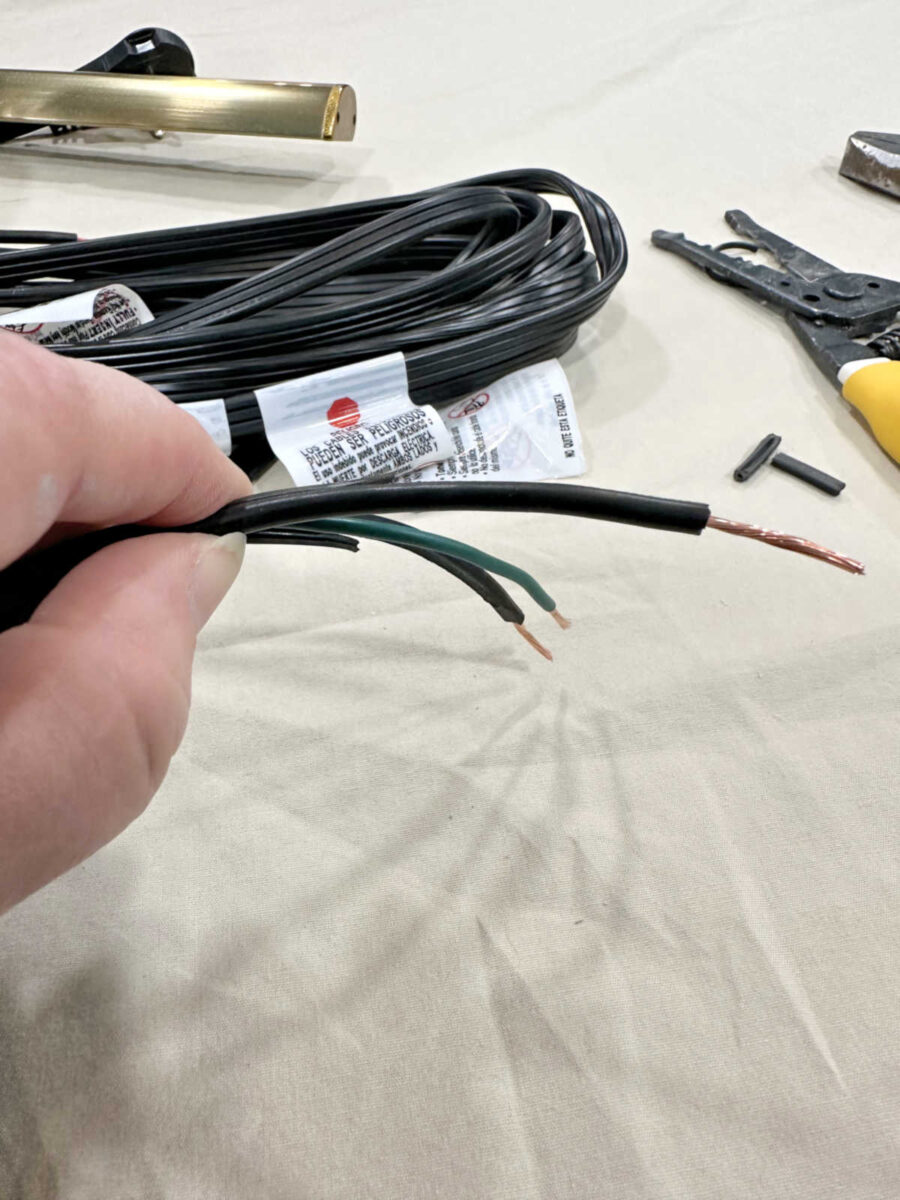
And then I used my wire cutters to cut the receptacle end off of the cord.
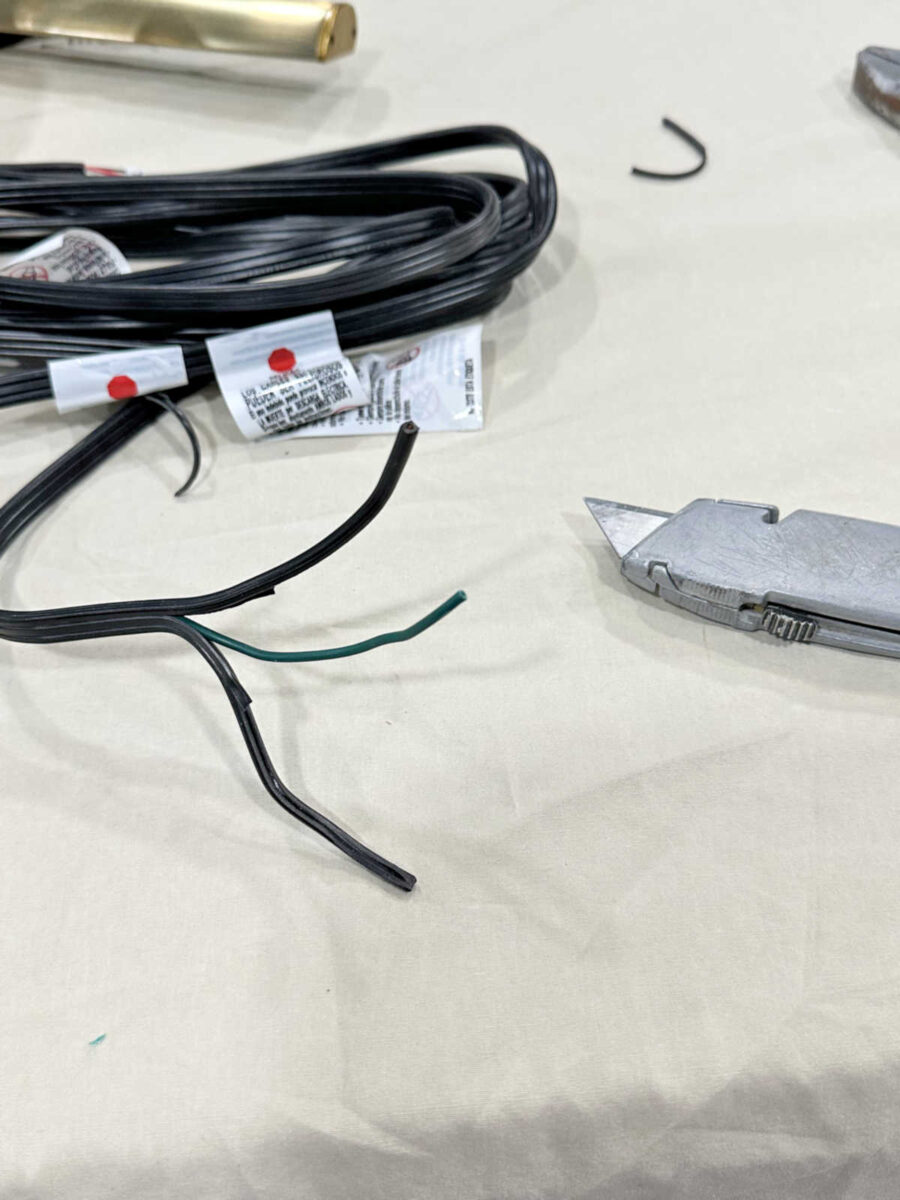
Using my utility knife, I separated the three wires.
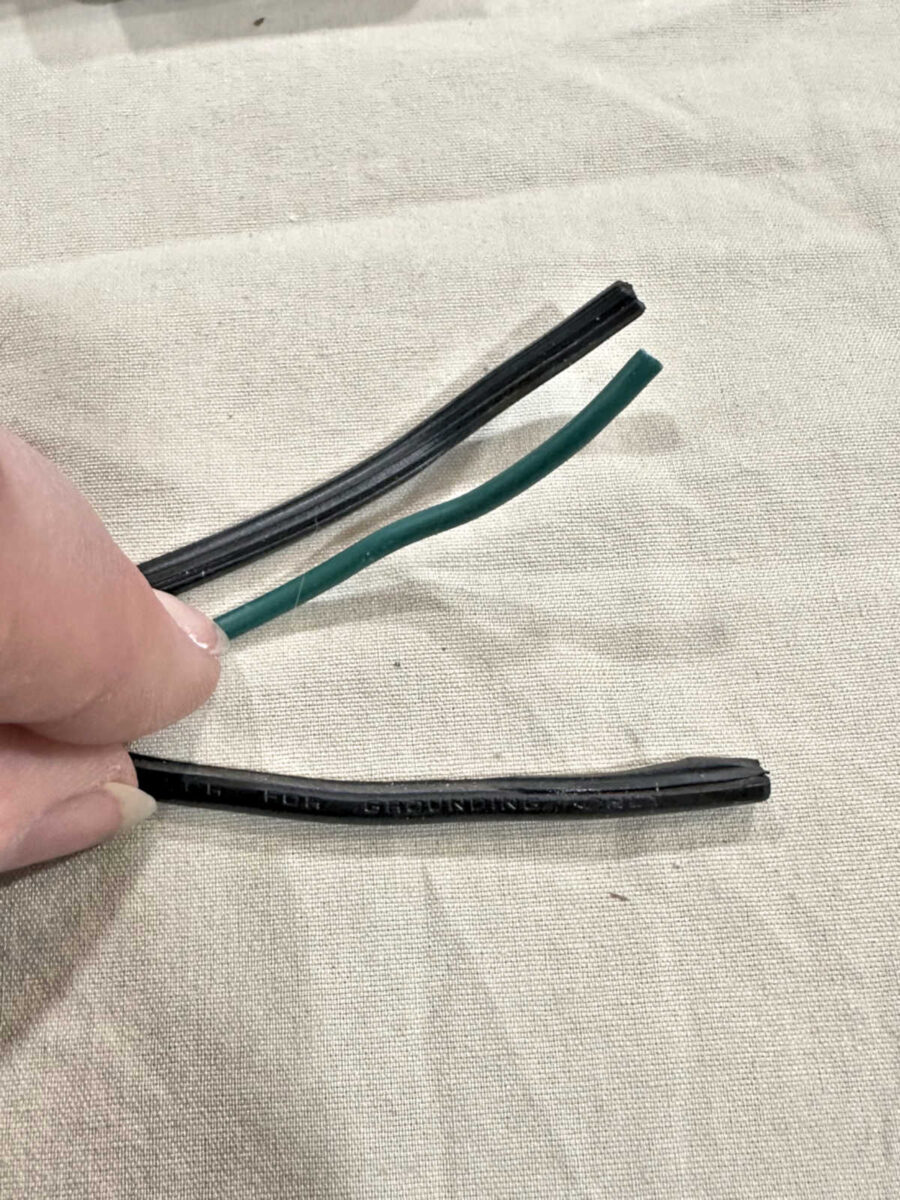
Next, I identified the hot wire and the neutral wire. The wires inside of extension cords are almost never wrapped in black and white, so it’s not quite as easy to identify which one is hot and which one is neutral. But all you have to do is look at the sheathing on each wire. You’ll notice that the sheathing on one will be smooth, and the sheathing on the other will be ribbed going the length of the wire. The ribbed wire is the neutral that connects to the white wire in the light fixture. The smooth wire is the hot wire that connects to the black wire in the fixture.
Hopefully you can see what I mean in the photo below. The wire on the bottom is the smooth (hot) wire and the wire on the top is the neutral (ribbed) wire. You do have to be careful not to pay attention to the areas where the individual sheathings were cut or torn apart. Those torn/cut parts can often be mistaken for the ribbed sheathing, so you have to be sure to ignore those areas.
And then stripped the end of each wire about 5/8 inch.
And finally, I put the wires through the hole on the backplate of the light, and wired the cord to the light — smooth to black, ribbed to white, and ground to ground.
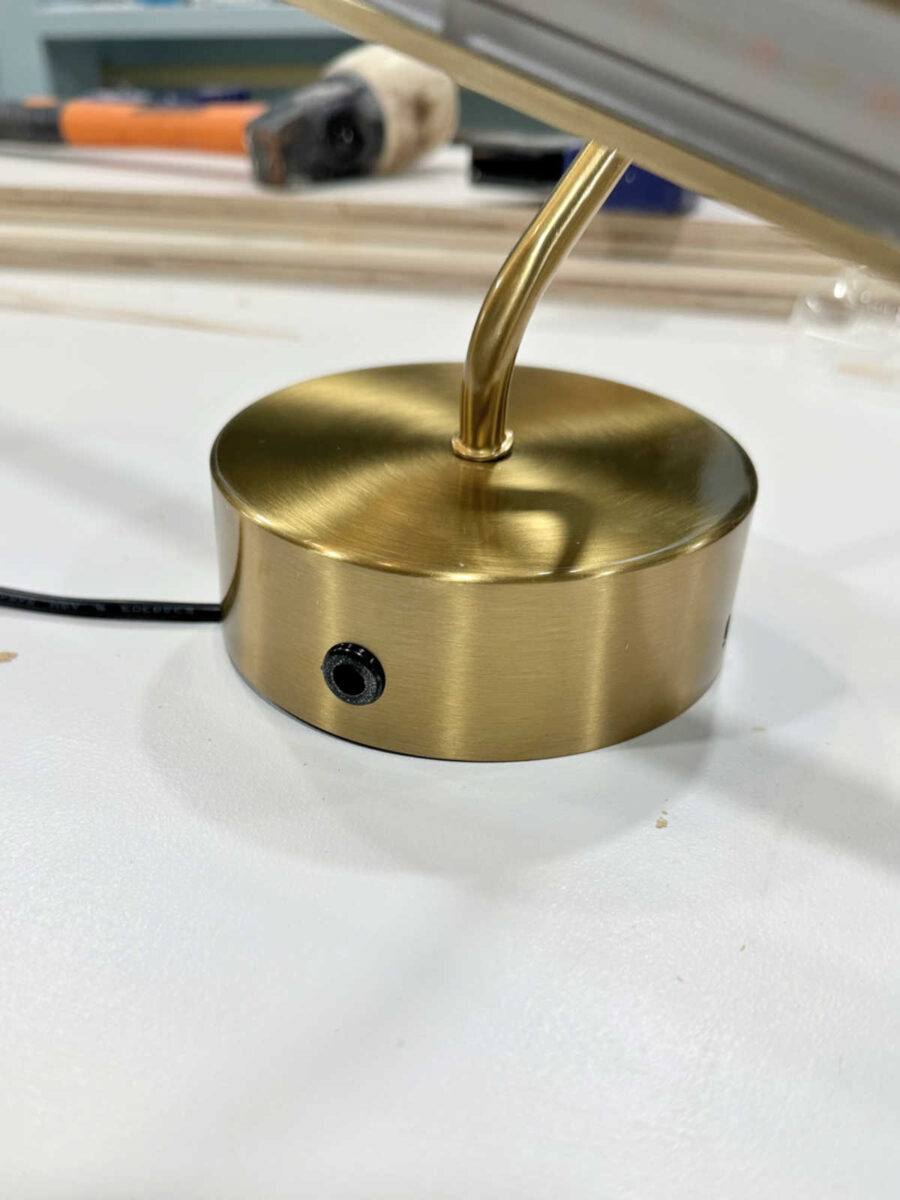
The installation was the same as it would have been had I hardwired it. I used the same mounting plate provided. The only difference is that the cord comes out the bottom of the light and runs behind the picture.

I really love these lights. They come with a remote, and you can change the color as well as the brightness.
I want to share one more of my projects from yesterday that might be helpful for some of you. I have four outlets that were covered over by the closet cabinets, so they needed to be uncovered. Generally, I used box extenders so that they outlets can be extended so that they’re flush with the back of the cabinets. But in this case, there wasn’t enough wire to bring them forward that much. So I had to get creative.
I used my Dremel Multi-Max to cut a rectangle that was about 1.25″ larger than the outlet on each side. And then I used a full coverage paintable outlet cover on the wall.
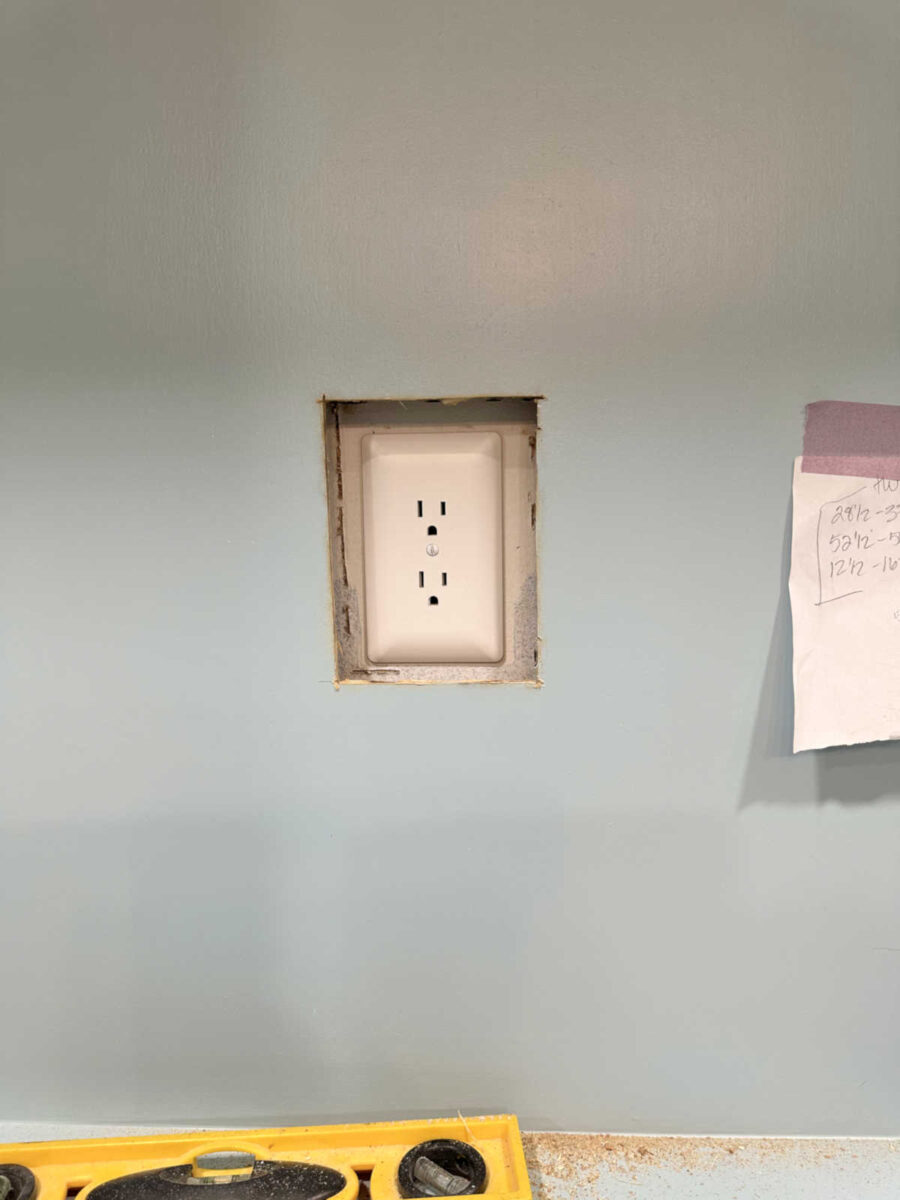
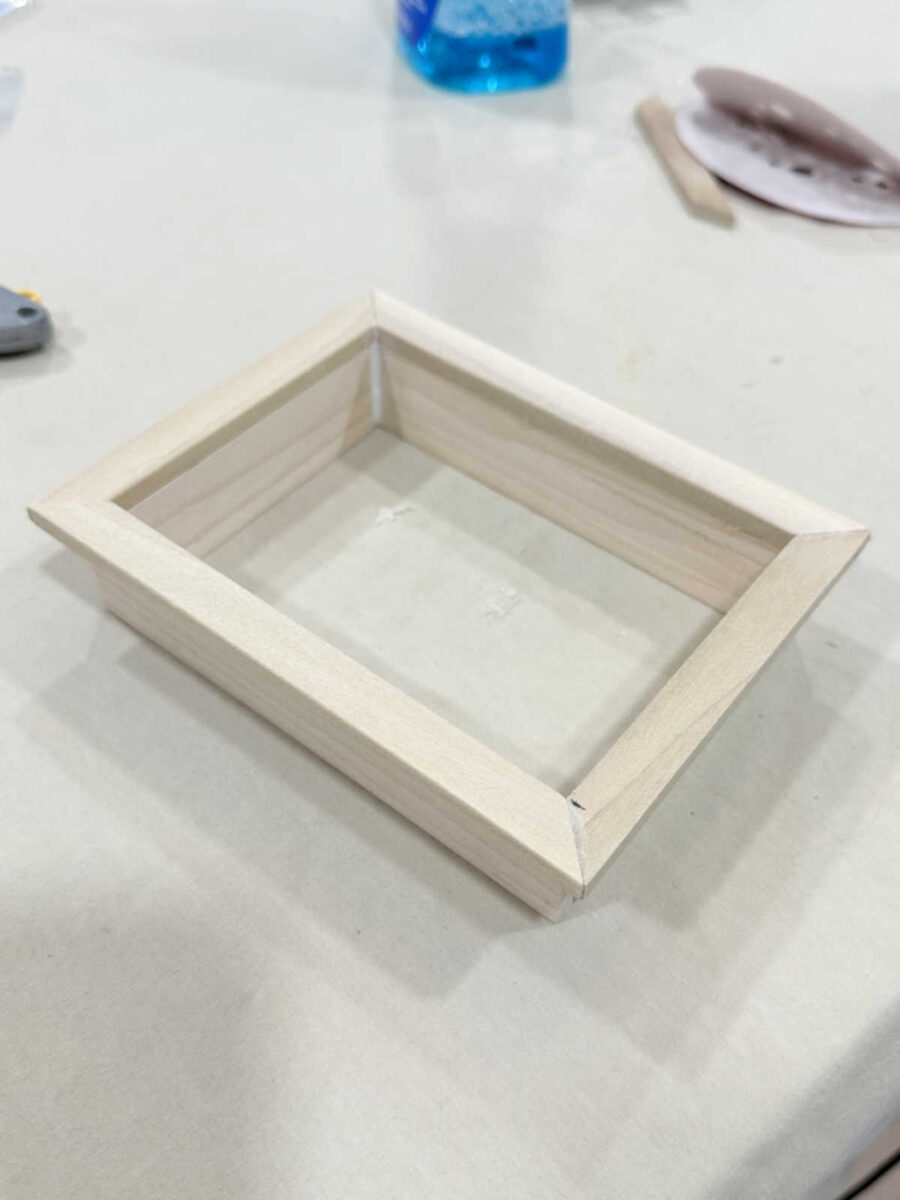
Then I used 1/4″ wood, cut to the width I needed on my table saw, and made this dimensional frame. The back part fits into the rectangle I cut and sits against the wall, and the front part frames it so that the cut edges of the cabinet back are hidden.
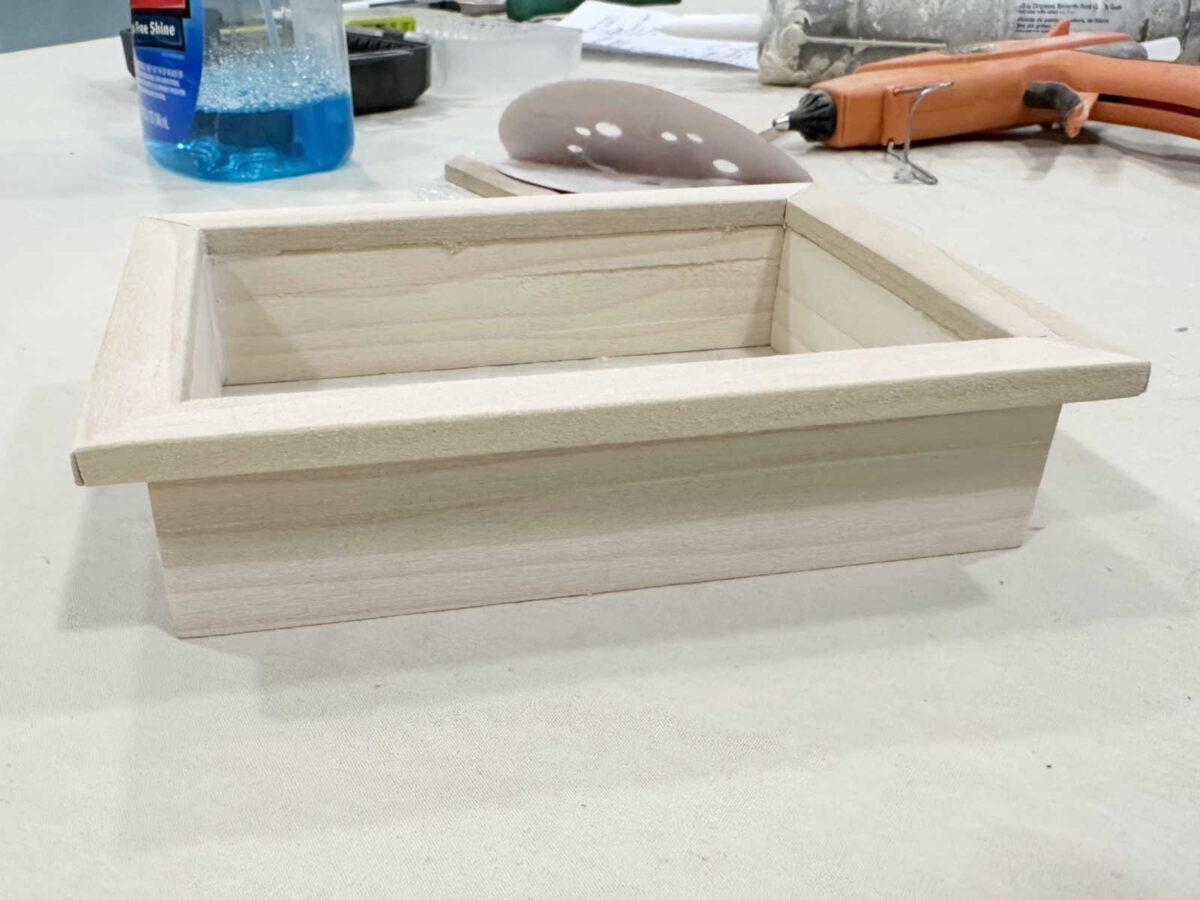
I put it together with my hot glue gun, did a little caulking, and then placed it into the rectangle cutout and secured it with 5/8″ 18-gauge nails.
And then I painted the whole thing to match the back of the cabinet.
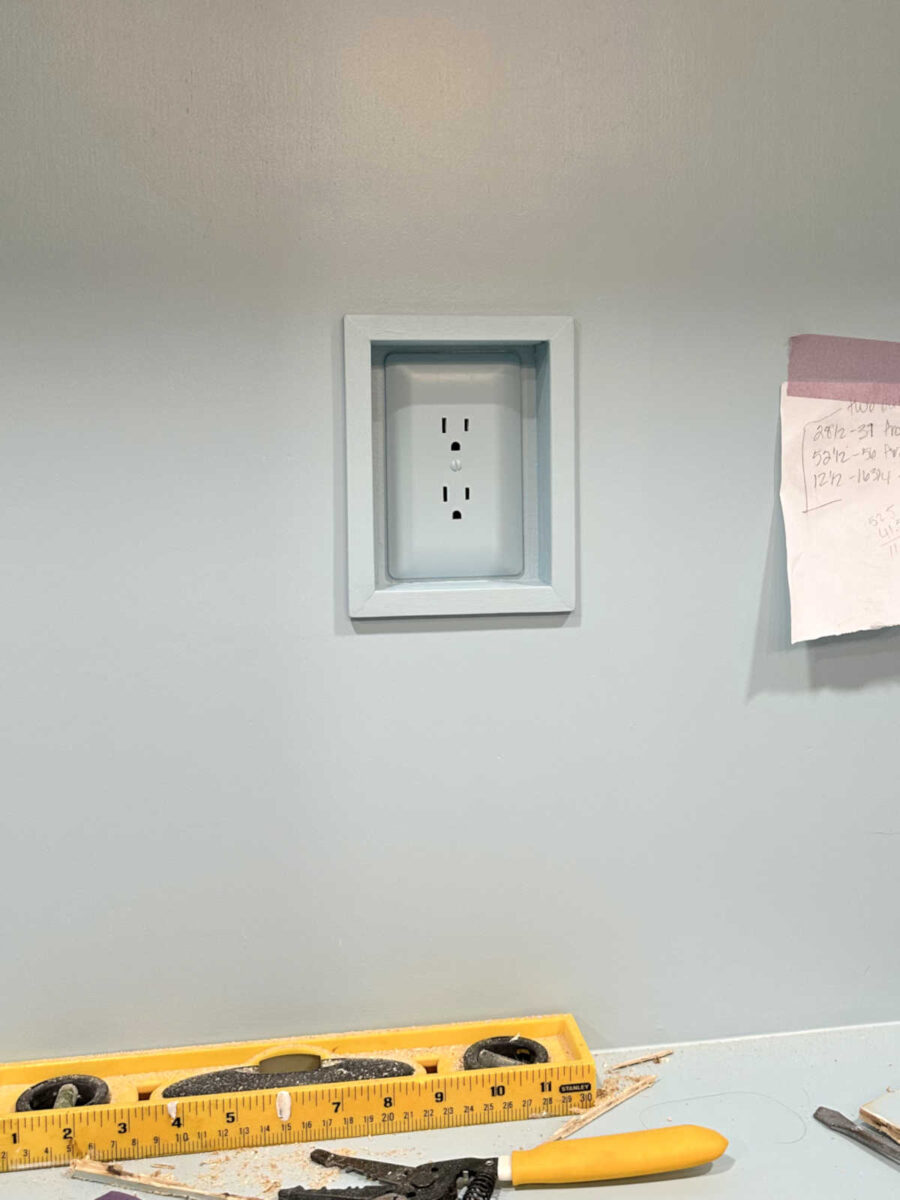
I actually like that it’s set back from the cabinet like this. Since this is a section for hanging clothes, I feel like it’s safer having it recessed like that. So it worked out great!
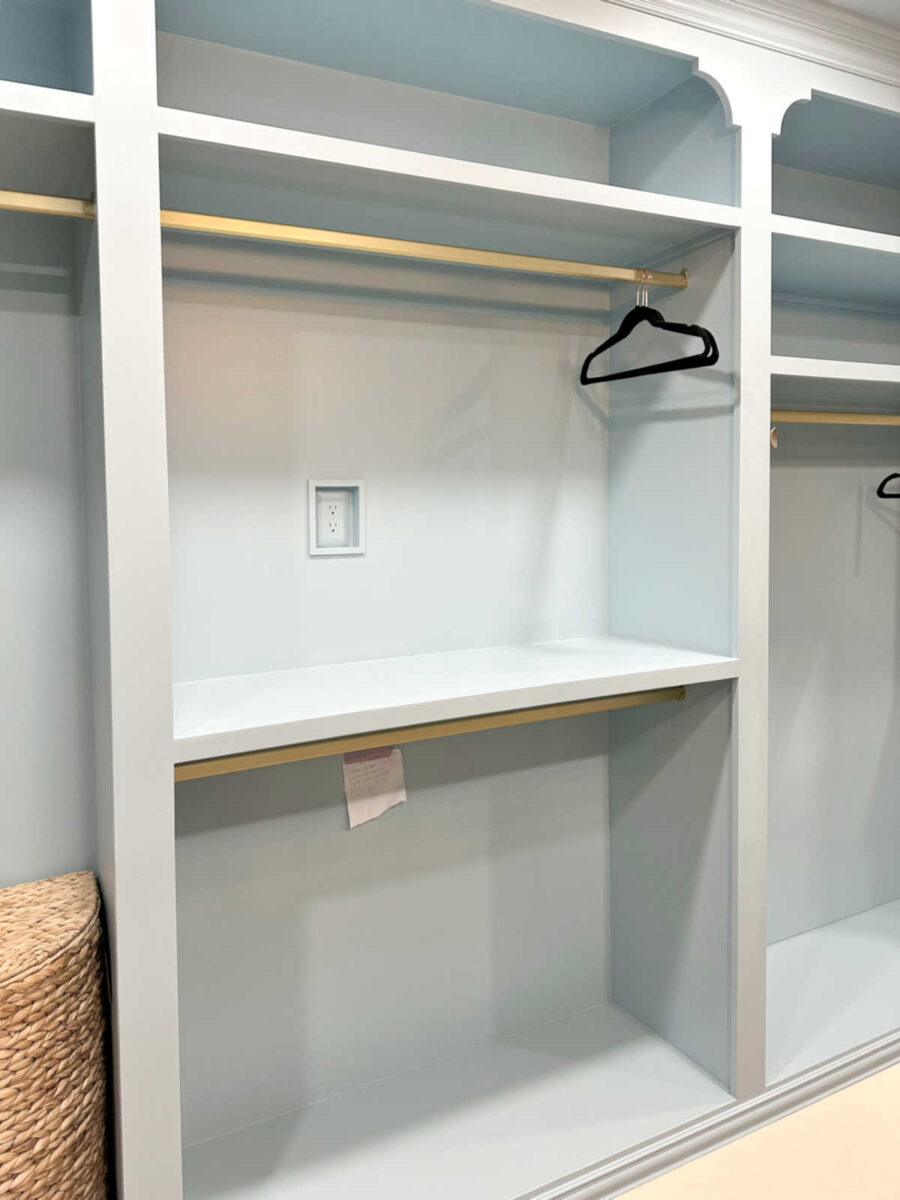
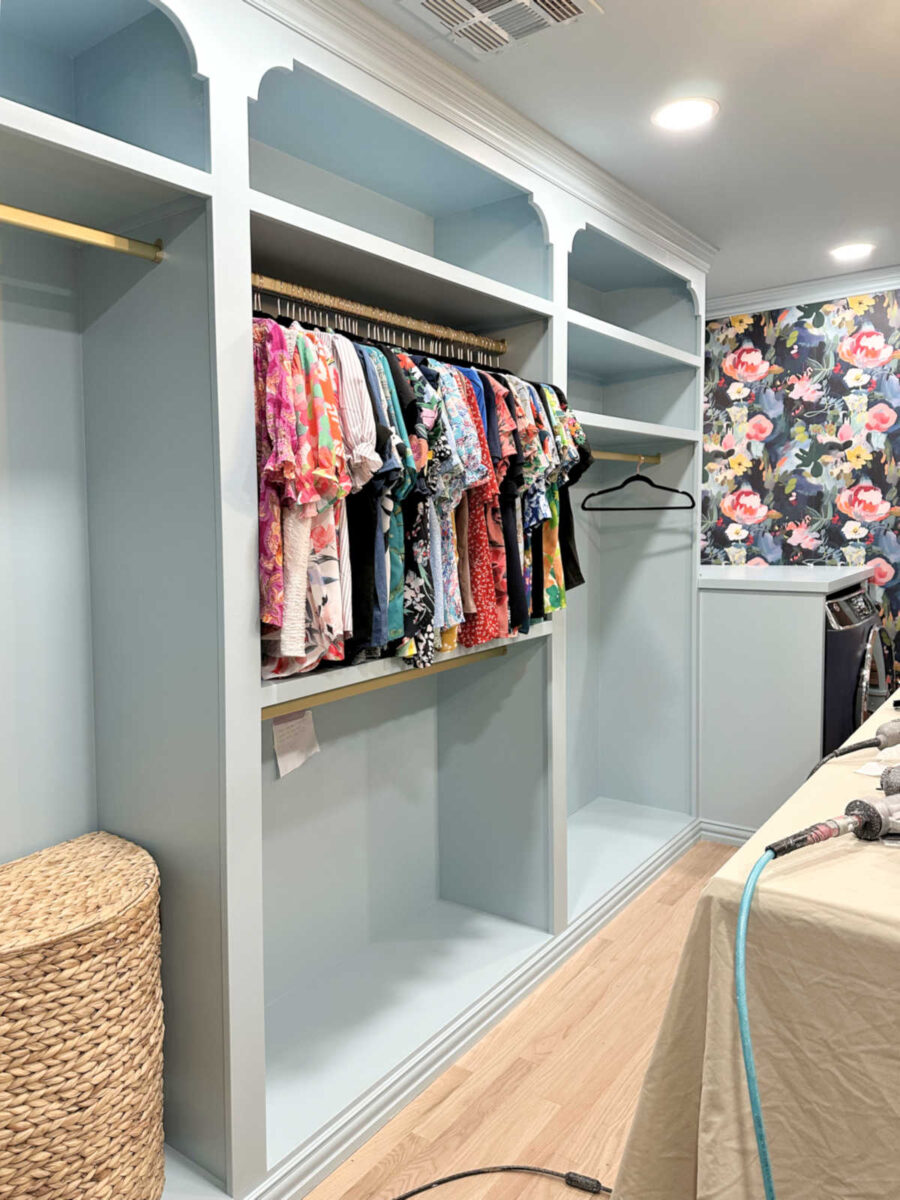
And once that paint was dry, I could finally start bringing stuff in! I didn’t get very far with it, but I did get this section filled…
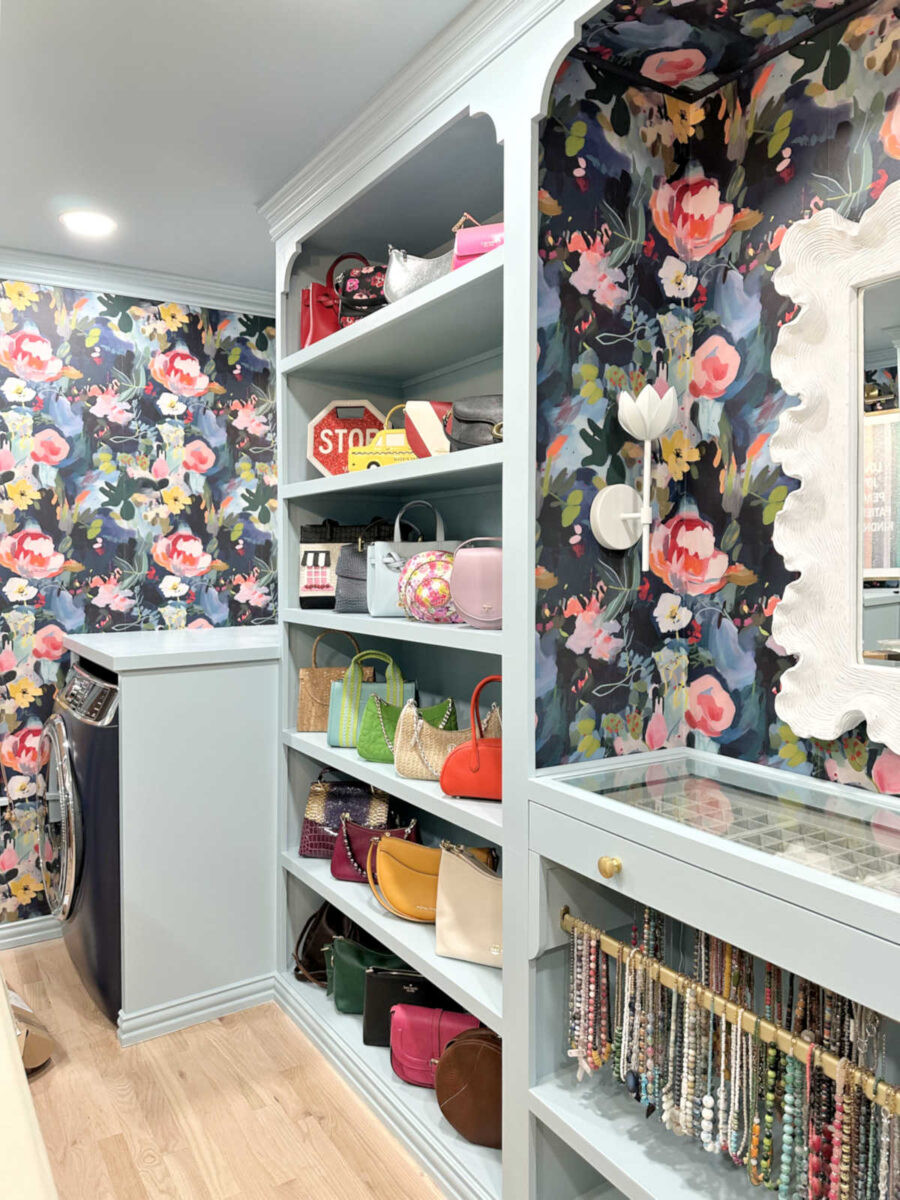
And then I brought in all of my handbags and got them arranged.
So I am inching my way towards that finish line, slowly but surely!
More About My Walk-In Closet/Laundry Room

see all walk-in
closet diy projects

read all walk-in
closet blog posts

Addicted 2 Decorating is where I share my DIY and decorating journey as I remodel and decorate the 1948 fixer upper that my husband, Matt, and I bought in 2013. Matt has M.S. and is unable to do physical work, so I do the majority of the work on the house by myself. You can learn more about me here.
Trending Products